
Docker私有镜像仓库Harbor
Harbor介绍 Harbor 是为企业用户设计的开源镜像仓库项目,包括了权限管理(RBAC)、LDAP、审计、安全漏洞扫描、镜像验真、管理界面、自我注册、HA等企业必需的功能,同时针对中国用户的特点,设计镜像复制和中文支持等功能。
官网:https://goharbor.io/
Harbor安装部署 可以准备台新的虚拟机:docker02 10.0.0.200 2核4G
# 1.harbor安装的环境要求

> **适用环境**:yum(CentOS 8+ 应用 dnf)。文中命令按当时环境记录,新系统上请对照官方文档调整。

安装Harbor必须有docker环境和docker-compose环境
yum install -y docker-ce
yum install -y docker-compose

# 2.解压harbor安装包
[root@docker02 ~]# tar xf harbor-offline-installer-v1.9.0-rc1.tgz
[root@docker02 ~/harbor]# ll
total 605144
-rw-r--r-- 1 root root 619632806 Sep  4  2019 harbor.v1.9.0.tar.gz
-rw-r--r-- 1 root root      5805 Sep  4  2019 harbor.yml
-rwxr-xr-x 1 root root      5088 Sep  4  2019 install.sh
-rw-r--r-- 1 root root     11347 Sep  4  2019 LICENSE
-rwxr-xr-x 1 root root      1748 Sep  4  2019 prepare

# harbor.yml //docker-compose的编排文件,有点像tower的Playbook

# 3.修改harbor配置
[root@docker02 ~/harbor]# vim harbor.yml
hostname: 10.0.0.200
harbor_admin_password: Harbor12345

# 4.执行安装脚本
[root@docker02 ~/harbor]# sh install.sh
[Step 1]: loading Harbor images ...
Cannot connect to the Docker daemon at unix:///var/run/docker.sock. Is the docker daemon running?

# 5.没启Docker,启下docker
[root@docker02 ~/harbor]# systemctl start docker
[root@docker02 ~/harbor]# sh install.sh
[Step 0]: checking installation environment ...
Note: docker version: 24.0.7
Note: docker-compose version: 1.18.0
[Step 1]: loading Harbor images ...
...
...
[Step 2]: preparing environment ...
...
...
Creating redis ... done
Creating harbor-core ... done
Creating network "harbor_harbor" with the default driver
Creating nginx ... done
Creating harbor-db ...
Creating registryctl ...
Creating harbor-portal ...
Creating redis ...
Creating registry ...
Creating harbor-core ...
Creating nginx ...
Creating harbor-jobservice ...
✔ ----Harbor has been installed and started successfully.----
Now you should be able to visit the admin portal at http://10.0.0.200.
For more details, please visit https://github.com/goharbor/harbor .

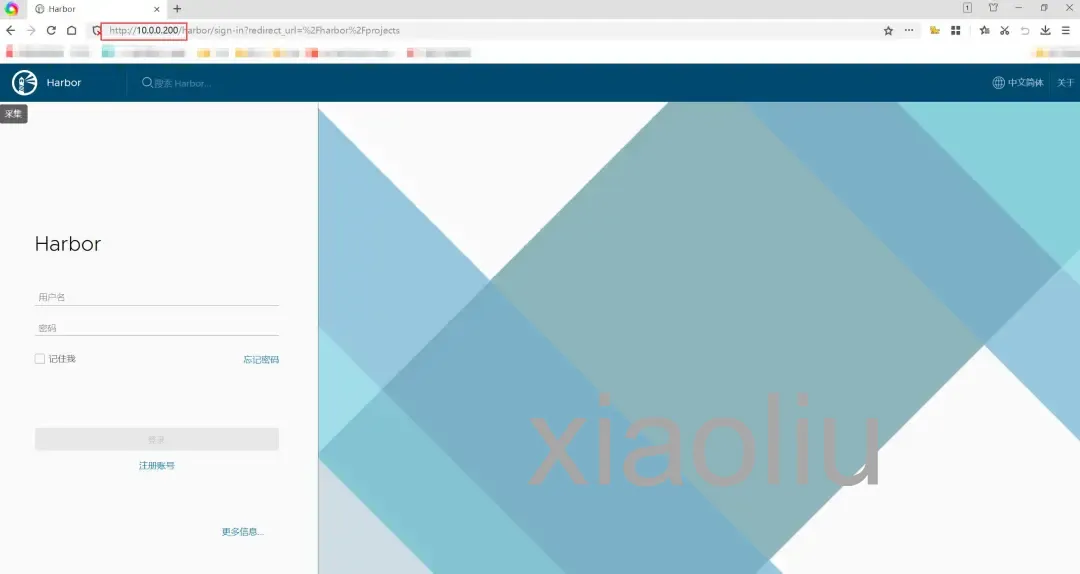
# 6.浏览器访问http://10.0.0.200
用户名admin
密码Harbor12345
[root@docker02 ~]# docker images //看下,拉了一堆镜像,都是harbor要用的
REPOSITORY                     TAG                       IMAGE ID       CREATED       SIZE
goharbor/chartmuseum-photon     v0.9.0-v1.9.0             47c00be3913e   4 years ago   130MB
goharbor/harbor-migrator       v1.9.0                     9826462ead7c   4 years ago   363MB
goharbor/redis-photon           v1.9.0                     9796fe9032f1   4 years ago   108MB
...

[root@docker02 ~]# docker ps //也起了一堆容器,而且你重启docker后可以开容自启
...

[root@docker02 ~]# cd harbor //也多出来一些东西
[root@docker02 ~/harbor]# ll
total 605152
drwxr-xr-x 3 root root        20 Jan  3 14:15 common
-rw-r--r-- 1 root root      5285 Jan  3 14:15 docker-compose.yml #//这个就是harbor的docker-compose文件
-rw-r--r-- 1 root root 619632806 Sep  4  2019 harbor.v1.9.0.tar.gz
-rw-r--r-- 1 root root      5799 Jan  3 14:12 harbor.yml
-rwxr-xr-x 1 root root      5088 Sep  4  2019 install.sh
-rw-r--r-- 1 root root     11347 Sep  4  2019 LICENSE
-rwxr-xr-x 1 root root      1748 Sep  4  2019 prepare

# 重启机器后开启harbor的命令
[root@docker02 ~/harbor]# docker-compose up -d   //在启动脚本里可以看到
在harbor中上传镜像
例:将上节docker01机器构建的镜像上传至harbor
# 1.修改镜像名称
# 查看镜像
[root@docker01 ~]# docker images
REPOSITORY                     TAG       IMAGE ID       CREATED         SIZE
nginx                          c7_v3     b61e011c7a89   28 hours ago   289MB
# 给镜像改名(会生成一个新的镜像,与原镜像同一个ID,是一样的。原来的可以删掉)
[root@docker01 ~]# docker tag nginx:c7_v3 10.0.0.200/h5_games/nginx:c7_v3
[root@docker01 ~]# docker images
REPOSITORY                     TAG       IMAGE ID       CREATED         SIZE
10.0.0.200/h5_games/nginx       c7_v3     88b3d5a6d73f   2 hours ago     289MB
nginx                           c7_v3     88b3d5a6d73f   2 hours ago     289MB

###命名规则###
照着上面截图命名即可:
harbor服务器地址/项目名称/镜像名称:标签
10.0.0.200/h5_games/nginx:c7_v3

# 2.修改docker配置文件,信任harbor仓库地址
[root@docker01 /etc/docker]# vim daemon.json
{
 "bip": "192.168.10.1/24",
 "registry-mirrors": ["https://pgz00k39.mirror.aliyuncs.com"],
 "insecure-registries": ["http://10.0.0.200"]
}
[root@docker01 ~]# systemctl restart docker


# 3.登录harbor
[root@docker01 ~]# docker login 10.0.0.200
Username: admin
Password:
WARNING! Your password will be stored unencrypted in /root/.docker/config.json.
Configure a credential helper to remove this warning. See
https://docs.docker.com/engine/reference/commandline/login/#credentials-store

Login Succeeded


# 4.推送镜像
[root@docker01 ~]# docker push 10.0.0.200/h5_games/nginx:c7_v3
The push refers to repository [10.0.0.200/h5_games/nginx]
cc5163efebe5: Pushed
dff3e2c393d5: Pushed
174f56854903: Pushed
c7_v3: digest: sha256:c1dd2312005598b49a1c2071ad86f45cd084eb46ffe3b2cc378417957f07fd1a size: 953

ps:每一层都有ID,其中有一个就是centos:7的层
拉取镜像到harbor本机
# 直接拉报错
[root@docker02 ~]# docker pull 10.0.0.200/app/web:v1
Error response from daemon: Get "https://10.0.0.200/v2/": dial tcp 10.0.0.200:443: connect: connection refused

[root@docker02 ~]# cd /etc/docker
[root@docker02 /etc/docker]# ll
total 0
[root@docker02 /etc/docker]# vim daemon.json
{
 "bip": "192.168.10.1/24",
 "registry-mirrors": ["https://pgz00k39.mirror.aliyuncs.com"],
 "insecure-registries": ["http://10.0.0.200"]
}
[root@docker02 /etc/docker]# systemctl restart docker
[root@docker02 ~/harbor]# docker-compose up -d

# 要登录下才行
[root@docker02 ~/harbor]# docker login 10.0.0.200
Username: admin
Password:
WARNING! Your password will be stored unencrypted in /root/.docker/config.json.
Configure a credential helper to remove this warning. See
https://docs.docker.com/engine/reference/commandline/login/#credentials-store

Login Succeeded

[root@docker02 ~/harbor]# docker pull 10.0.0.200/app/web:v1