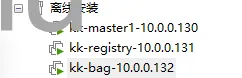
初始化
适用环境:K8s 1.10~1.23(已停止支持);yum(CentOS 8+ 应用 dnf)。文中命令按当时环境记录,新系统上请对照官方文档调整。 ⚠️ 安全提示:本文包含「关闭防火墙、永久关闭 SELinux」等操作,属于内网/测试环境做法。公网机器请勿直接照搬 —— 正确做法是保留 SELinux 与防火墙,按需放行具体端口。
所有的机器都要执行
## dns
echo "nameserver 114.114.114.114" > /etc/resolv.conf
## kk部署依赖
yum update -y
yum install conntrack socat curl socat conntrack ebtables ipset ipvsadm  chrony  -y
## 服务器时区
timedatectl set-timezone Asia/Shanghai
## 时间同步
sed -i 's/^pool pool.*/pool cn.pool.ntp.org iburst/g' /etc/chrony.conf && systemctl enable chronyd --now && chronyc sourcestats -v
## 关闭系统防火墙
systemctl stop firewalld && systemctl disable firewalld
## 禁止selinux
sed -i 's/^SELINUX=enforcing/SELINUX=disabled/' /etc/selinux/config

# 创建密钥
ssh-keygen -t rsa -b 4096
# master到所有都要免密
ssh-copy-id root@10.0.0.131
常用kk命令
## 删除集群
./kk delete cluster -f config-sample.yaml
## 创建集群
./kk create cluster -f config-sample.yaml
## 根据需求创建文件
./kk create config --name ksp-v131 -f ksp-v131.yaml --with-kubernetes v1.31.0
## 安装ks k8s
./kk create cluster --with-kubernetes v1.22.12 --with-kubesphere v3.4.1
# 默认存储
./kk create cluster -f config-sample.yaml  --with-local-storage
补全kubectl
yum install  -y bash-completion
echo 'source <(kubectl completion bash)' >>~/.bashrc
kubectl completion bash >/etc/bash_completion.d/kubectl
source ~/.bashrc
安装kk
mkdir ~/kubekey
cd ~/kubekey/

# 选择中文区下载(访问 GitHub 受限时使用)
export KKZONE=cn
curl -sfL https://get-kk.kubesphere.io | sh -

# 查看 KubeKey 支持的 Kubernetes 版本列表
./kk version --show-supported-k8s
创建配置文件
./kk create config --name ksp-v131 -f ksp-v131.yaml --with-kubernetes v1.31.0
编辑配置文件, vim ksp-v131.yaml,主要修改 kind: Cluster 小节的相关配置,修改说明如下。
- hosts:指定节点的 IP、ssh 用户、ssh 密码、ssh 端口。示例演示了 ssh 端口号的配置方法。
- roleGroups:指定 3个 etcd、control-plane 节点, 3个 worker 节点
- internalLoadbalancer: 启用内置的 HAProxy 负载均衡器
- domain:自定义域名 lb.opsxlab.cn,无特殊需求可使用默认值 lb.kubesphere.local
- clusterName:自定义 opsxlab.cn,无特殊需求可使用默认值 cluster.local
- autoRenewCerts:该参数可以实现证书到期自动续期,默认为 true
- containerManager:使用 containerd
- storage.openebs.basePath:新增配置,指定 openebs 默认存储路径为 /data/openebs/local
单机all
apiVersion: kubekey.kubesphere.io/v1alpha2
kind: Cluster
metadata:
  name: sample                         # 集群的名字
spec:
  hosts:
  - {name: master, address: 192.168.137.129, internalAddress: 192.168.137.129, user: root, password: "填写该节点的密码"}
  - {name: node1, address: 192.168.137.130, internalAddress: 192.168.137.130, user: root, password: "填写该节点的密码"}
  roleGroups:
    etcd:                              # etcd 存储集群数据的
    - master
    control-plane:                     # 管理集群的
    - master
    worker:                            # 具体干活的节点
    - master
    - node1
  controlPlaneEndpoint:                # 启动内置的 HaProxy 负载均衡器
    ## Internal loadbalancer for apiservers
    internalLoadbalancer: haproxy      # 启动集群内部负载均衡

    domain: lb.kubesphere.local        # 自定义集群域名,无特殊要求使用默认的即可
    address: ""
    port: 6443
  kubernetes:
    version: v1.29.5                   # K8s版本
    clusterName: cluster.local         # 自定义集群名字,无特殊要求使用默认即可
    autoRenewCerts: true               # 打开后,集群证书到期自动续期
    containerManager: docker           # 使用docker做容器运行时,也可以换成containerd,看k8s的版本支持哪个运行时就用哪个运行时
  etcd:
    type: kubekey
  network:
    plugin: calico
    kubePodsCIDR: 10.233.64.0/18
    kubeServiceCIDR: 10.233.0.0/18
    ## multus support. https://github.com/k8snetworkplumbingwg/multus-cni
    multusCNI:
      enabled: false

  storage:
    openebs:                           # 测试环境不装 存储会有问题
      basePath: /data/openebs/local    # 默认没有的新增配置,base path of the local PV 开发环境用openebs,生产环境使用NFS/Ceph做永久存储 要先创建/data/openebs/local目录


  registry:
    privateRegistry: ""                # 设置私有仓库时用,用于离线安装
    namespaceOverride: ""              # 给自己搭建的docker拉取平台起个名字
    registryMirrors: ["这里填写镜像加速地址"]
    insecureRegistries: []
  addons: []
一主双从配置文件

apiVersion: kubekey.kubesphere.io/v1alpha2
kind: Cluster
metadata:
  name: ksp-v131
spec:
  hosts:
    - {name: master1, address: 10.0.0.110, internalAddress: 10.0.0.110, user: root, password: "1"}
    - {name: node1, address: 10.0.0.111, internalAddress: 10.0.0.111, user: root, password: "1"}
    - {name: node2, address: 10.0.0.112, internalAddress: 10.0.0.112, user: root, password: "1"}
  roleGroups:
    etcd:
      - master1
    control-plane:
      - master1
    worker:
      - node1
      - node2
  controlPlaneEndpoint:
    domain: lb.kubesphere.local
    address: ""
    port: 6443
  kubernetes:
    version: v1.31.0
    clusterName: cluster.local
    autoRenewCerts: true
    containerManager: containerd
  etcd:
    type: kubekey
  network:
    plugin: calico
    kubePodsCIDR: 10.233.64.0/18
    kubeServiceCIDR: 10.233.0.0/18
    multusCNI:
      enabled: false
  storage:
    openebs:
      basePath: /data/openebs/local
  registry:
    privateRegistry: "registry.cn-hangzhou.aliyuncs.com" # 使用阿里云镜像
    namespaceOverride: "kubesphereio" # 阿里云镜像 KubeSphere 官方 namespace
    registryMirrors: []
    insecureRegistries: []
  addons: []
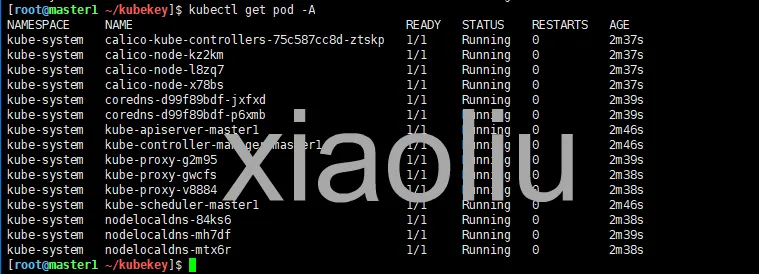
三主三从配置文件
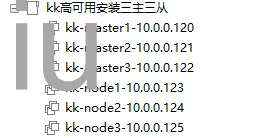
apiVersion: kubekey.kubesphere.io/v1alpha2
kind: Cluster
metadata:
  name: ksp-v131
spec:
  hosts:
    - {name: master1, address: 10.0.0.120, internalAddress: 10.0.0.120, user: root, password: "1"}
    - {name: master2, address: 10.0.0.121, internalAddress: 10.0.0.121, user: root, password: "1"}
    - {name: master3, address: 10.0.0.122, internalAddress: 10.0.0.122, user: root, password: "1"}
    - {name: node1, address: 10.0.0.123, internalAddress: 10.0.0.123, user: root, password: "1"}
    - {name: node2, address: 10.0.0.124, internalAddress: 10.0.0.124, user: root, password: "1"}
    - {name: node3, address: 10.0.0.125, internalAddress: 10.0.0.125, user: root, password: "1"}

  roleGroups:
    etcd:
      - master1
      - master2
      - master3
    control-plane:
      - master1
      - master2
      - master3
    worker:
      - node1
      - node2
      - node3
  controlPlaneEndpoint:
    ## Internal loadbalancer for apiservers
    internalLoadbalancer: haproxy

    domain: lb.kubesphere.local
    address: ""
    port: 6443
  kubernetes:
    version: v1.31.0
    clusterName: cluster.local
    autoRenewCerts: true
    containerManager: containerd
  etcd:
    type: kubekey
  network:
    plugin: calico
    kubePodsCIDR: 10.233.64.0/18
    kubeServiceCIDR: 10.233.0.0/18
    multusCNI:
      enabled: false
  storage:
    openebs:
      basePath: /data/openebs/local
  registry:
    privateRegistry: "registry.cn-hangzhou.aliyuncs.com" # 使用阿里云镜像
    namespaceOverride: "kubesphereio" # 阿里云镜像 KubeSphere 官方 namespace
    registryMirrors: []
    insecureRegistries: []
  addons: []
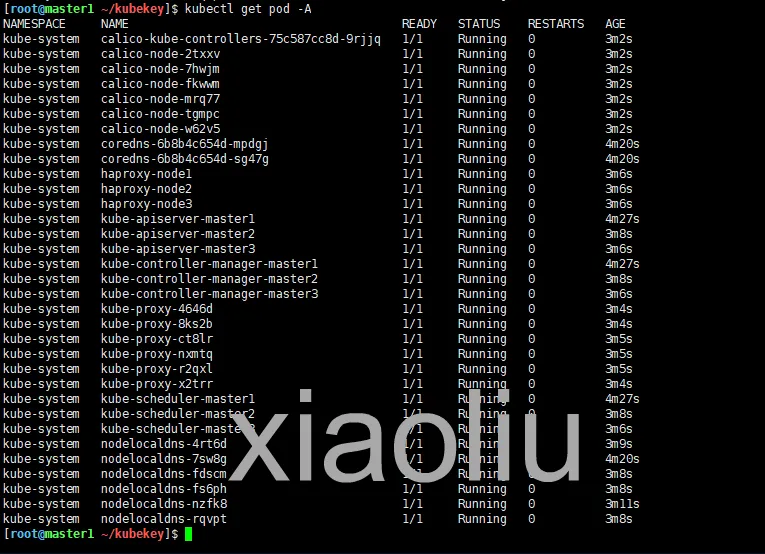
KubeSphere v4.1.2
借鉴
https://kubesphere.io/zh/docs/v4.1/03-installation-and-upgrade/02-install-kubesphere/02-install-kubernetes-and-kubesphere/ 环境
 创建配置文件
./kk create config --with-kubernetes v1.31.0
注:k8s中可以使用crictl来拉取镜像,ctr默认的配置还是没有改变不能拉取
离线安装
借鉴 https://www.kubesphere.io/zh/docs/v3.4/installing-on-linux/introduction/air-gapped-installation/
https://www.kubesphere.io/zh/blogs/deploying-kubesphere-and-k8s-offline-with-kubekey/ 环境